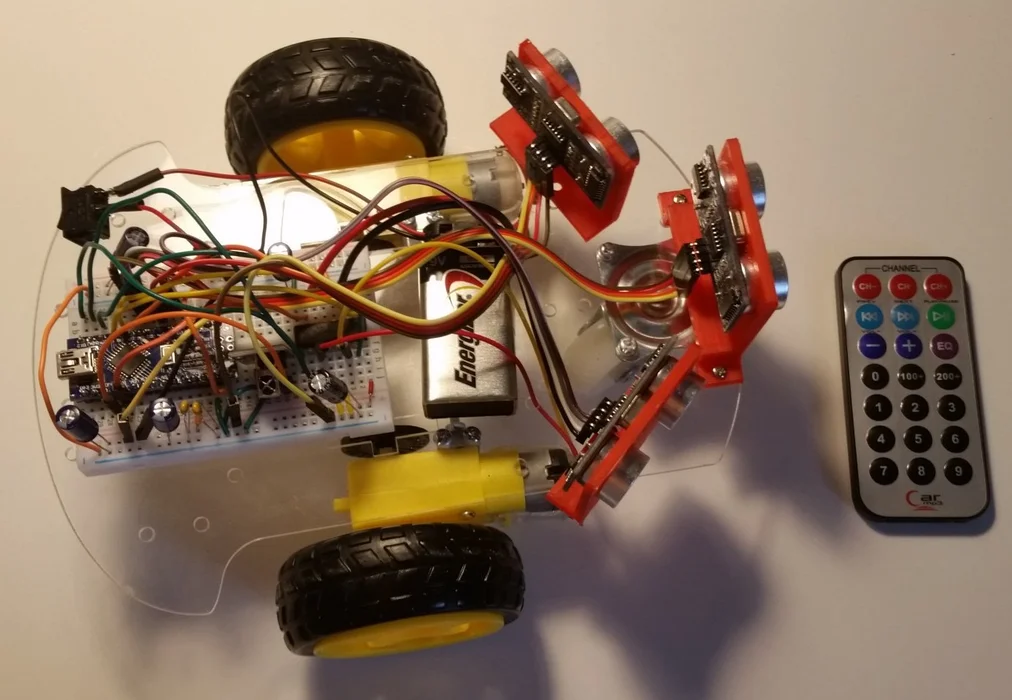
Arduino Self-Driving Car
Arduino Self-Driving Car
Hardware Components:
- 1x Car Chassis Kit:
- 2x Gear Motor
- 1x Car Chassis
- 2x Car Tire
- 1x 360° Wheel
- 1x Arduino Nano
- 1x Mini Breadboard
- 1x Motor Drive L293D
- 3x Ultrasonic Sensor HC SR04
- 3x Sensor support - 3D printed (see drawing below)
- 1x 9v Battery
- 1x On-off switch
- 5x 100uF capacitors
- 2x 0.1uF capacitors
- 1x IR Receiver
- 1x Remote Control
Software Components:
1. Arduino IDE
2. Google Maps/Maria API
3. Mobile App (LED App Admin Side)
System Workflow:
Automatic Driving Mode:
1. Get current location of car through GPS module.
2. Send location data to phone via GSM/Cellular module.
3. Phone connects to Google Maps/Maria API to get route.
4. API sends route instructions to Arduino.
5. Arduino processes instructions (forward, left, right).
6. Send instructions to motor control unit.
7. Repeat steps 5-6 until next instruction.
8. End navigation when destination is reached.
LED App Admin Side:
Screen 1: Destination Entry
1. Drop-down search using API.
2. Enter destination address.
3. Map view with route preview.
Screen 2: Real-time Navigation
1. Map updates real-time location of car.
2. Start navigation and bring car to destination.
3. Continue to next navigation route.
API Integration:
1. Google Maps/Maria API for routing and navigation.
2. API for drop-down search (e.g., Google Places API).
Technical Requirements:
1. GPS and GSM/Cellular module integration.
2. API integration with Arduino.
3. Mobile app development (LED App Admin Side).
4. Motor control unit programming.
5. Sensor integration (e.g., ultrasonic, lidar).
Assembling the chassis :
- Assemble the chassis
- The breadboard can be fixated at the back of the chassis.
- It is important that the battery is placed on the front part of the chassis due to its weight.
- Screw or glue the sensor supports on the front of the chassis
- The sensor can be placed with pressure on its supports. It's not necessary to glue or screw it.
- Wiring :


Comments
Post a Comment